• Latest
  • Recipes
  • About
  • Blog
I Bake, You Bake
  • Latest
  • Recipes
  • About
  • Blog

Surf's Up!

Throwback Thursday to the surf board cookies I made just before my daughter's first trip to surf camp.

image.jpg

This was my first foray into using stencils, which I did with royal icing versus airbrushing. I'm hooked! I love the texture it gives the cookies. 

image.jpg

Can't wait to try making these again!

image.jpg
tags: decorated, orange, blue, beach, royal icing, #tbt
categories: cookies
Monday 08.15.16
Posted by Michelle
 

You Are My Sunshine Cookies

The song, "You Are My Sunshine" holds a special place in my heart, as it's one I started singing to my daughter when she was in the NICU. Today, five years later, she's singing it to her baby dolls (and to me every now and then). So when my coworker asked if I'd be interested in making some sunshine-inspired treats for his daughter's second birthday, I had to say yes. 

These are made using my tried and true FAVORITE SUGAR COOKIE and ROYAL ICING recipes. But let's be honest -- these cookies are all about the styling. 

And by styling, I mean pretty pink, orange, and clear course sugar crystals with matching heart-shaped sprinkle bows and royal icing "cheeks". Because black icing and little kids never mixes well, I decided to draw the sunshine faces on using an Americolor edible marker.

I also played around with the photo "styling" a bit. I am not a professional photographer and even if I were, I think trying to capture fun, high-quality images of flat cookies would be difficult. There are only so many ways one can stack cookies to make them look interesting and still highlight the decorating. Let's just call this a continual work in progress...

View fullsize FullSizeRender_GF.jpg
View fullsize IMG_0536_GF.JPG
View fullsize IMG_0664_GF.JPG

Other notes:

  • I got the Sun Cookie Cutter from Copper Gifts. If I could buy all my cookie cutters from this amazing company, I would. All of their cookie cutters are handmade and are incredibly durable. 
  • The course sanding sugar crystals are from a Cake Boss three-pack I found at Michael's
  • I always try to apply sanding sugar or sugar crystals (let's just call these sprinkles for the sake of simplicity) after the royal icing has dried overnight. Yes, it means you need to devote more time to decorating the cookies, so it doesn't always work out in terms of timing, but the results are so worth it. If you've never tried the dry application method, do it! All you need is 1/4 teaspoon meringue powder mixed with 1/4 teaspoon warm water and a  small paint brush. Just "paint" the mixture onto the cookie where you want the sprinkles to stick, apply the sprinkles (I like to pour some in my hand for a little extra control), and tip the cookie over to remove the excess. Voila! Perfectly applied sprinkles without denting your royal icing or worrying about rogue sprinkles.
tags: birthday, royal icing, celebration, sugar cookies, decorated
categories: cookies
Tuesday 06.02.15
Posted by Michelle
Comments: 1
 

Construction-themed Party Treats

When a former coworker of mine asked if I'd be interested in making some treats for her grandson's first birthday, I jumped at the chance to work on a project that didn't entail pastel colors and flowers (not because I don't love them, but because it's just what I usually gravitate toward). 

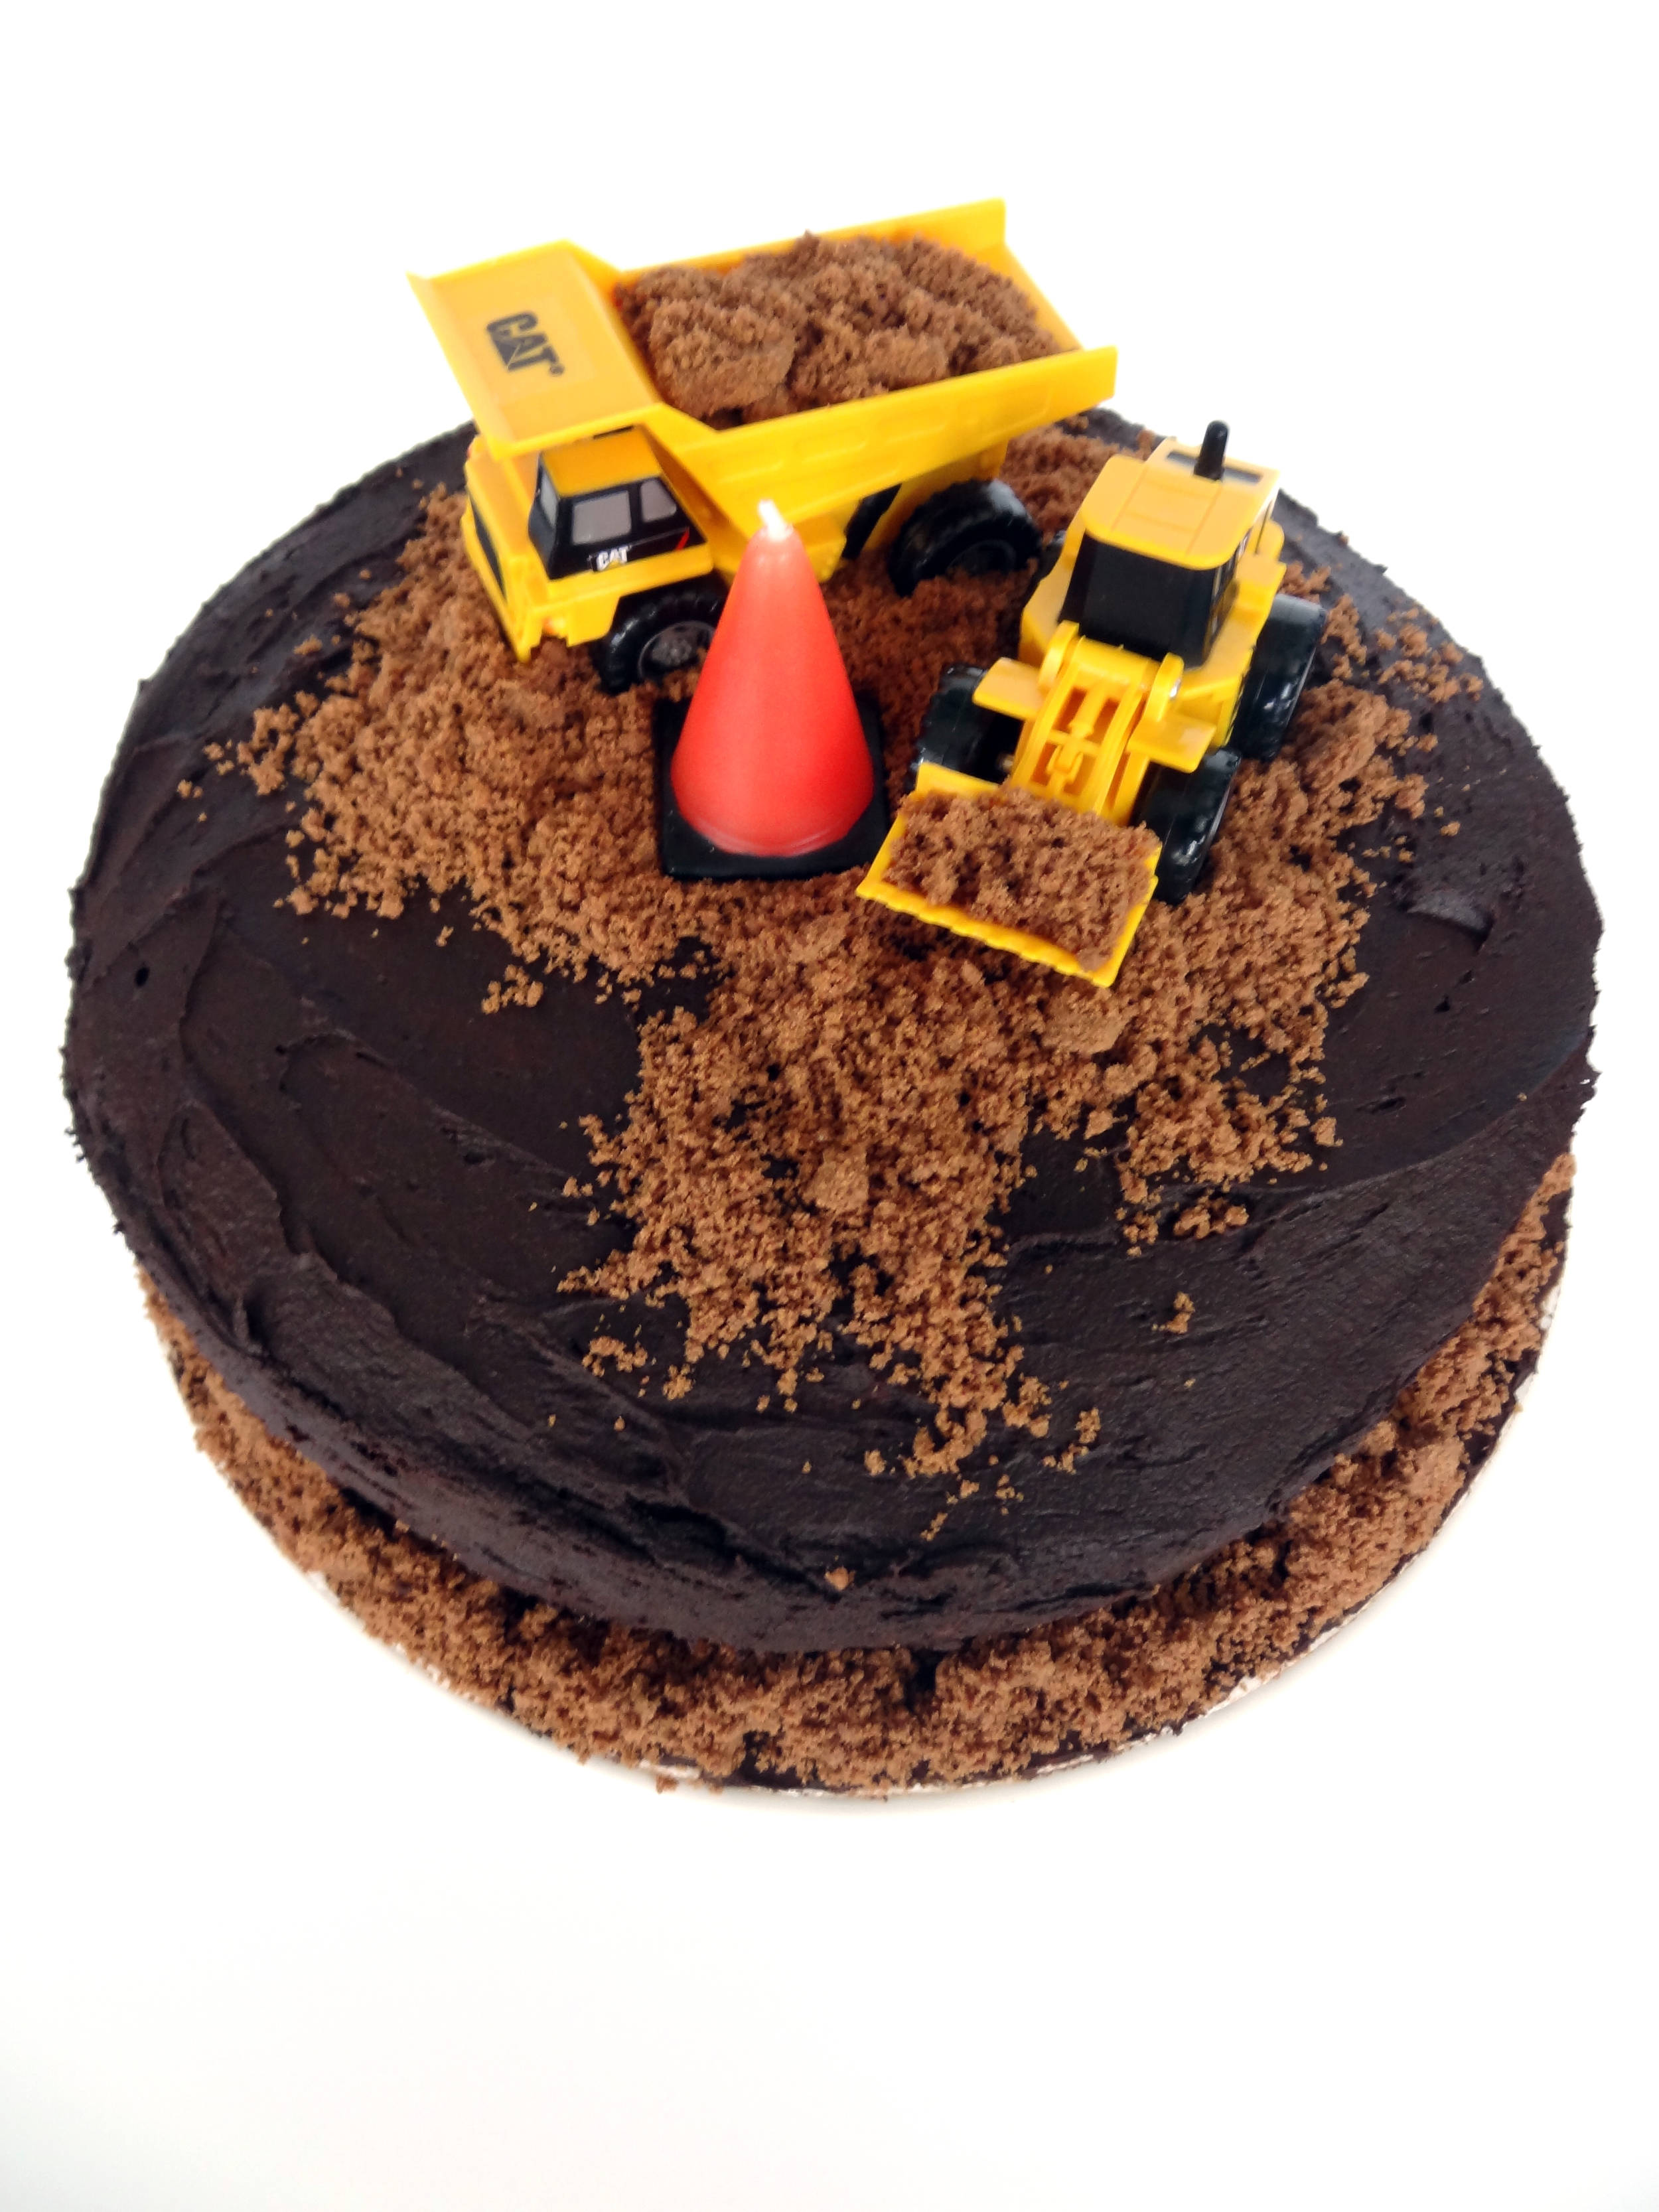
Construction-themed smash cake & sugar cookies

Construction-themed smash cake & sugar cookies

Everyone's inspired by Pinterest, right? But the problem with a lot of "pinned" cakes, especially themed-cakes, is that they're made of fondant -- not exactly great for a little boy's smash cake. So instead we focused on making the cake as editable as possible for a toddler while still encompassing the road construction-based party theme. 

What one-year old can resist a triple chocolate smash cake?

What one-year old can resist a triple chocolate smash cake?

I found a great, simple cake on Pinterest (courtesy of The Celebration Shoppe) and recreated it with dark chocolate buttercream frosting and crumbled chocolate pie crust "dirt". I found the CAT mini machines and construction cone candles on Amazon (links below). 

Close-up on the chocolate pie crust "dirt"

Close-up on the chocolate pie crust "dirt"

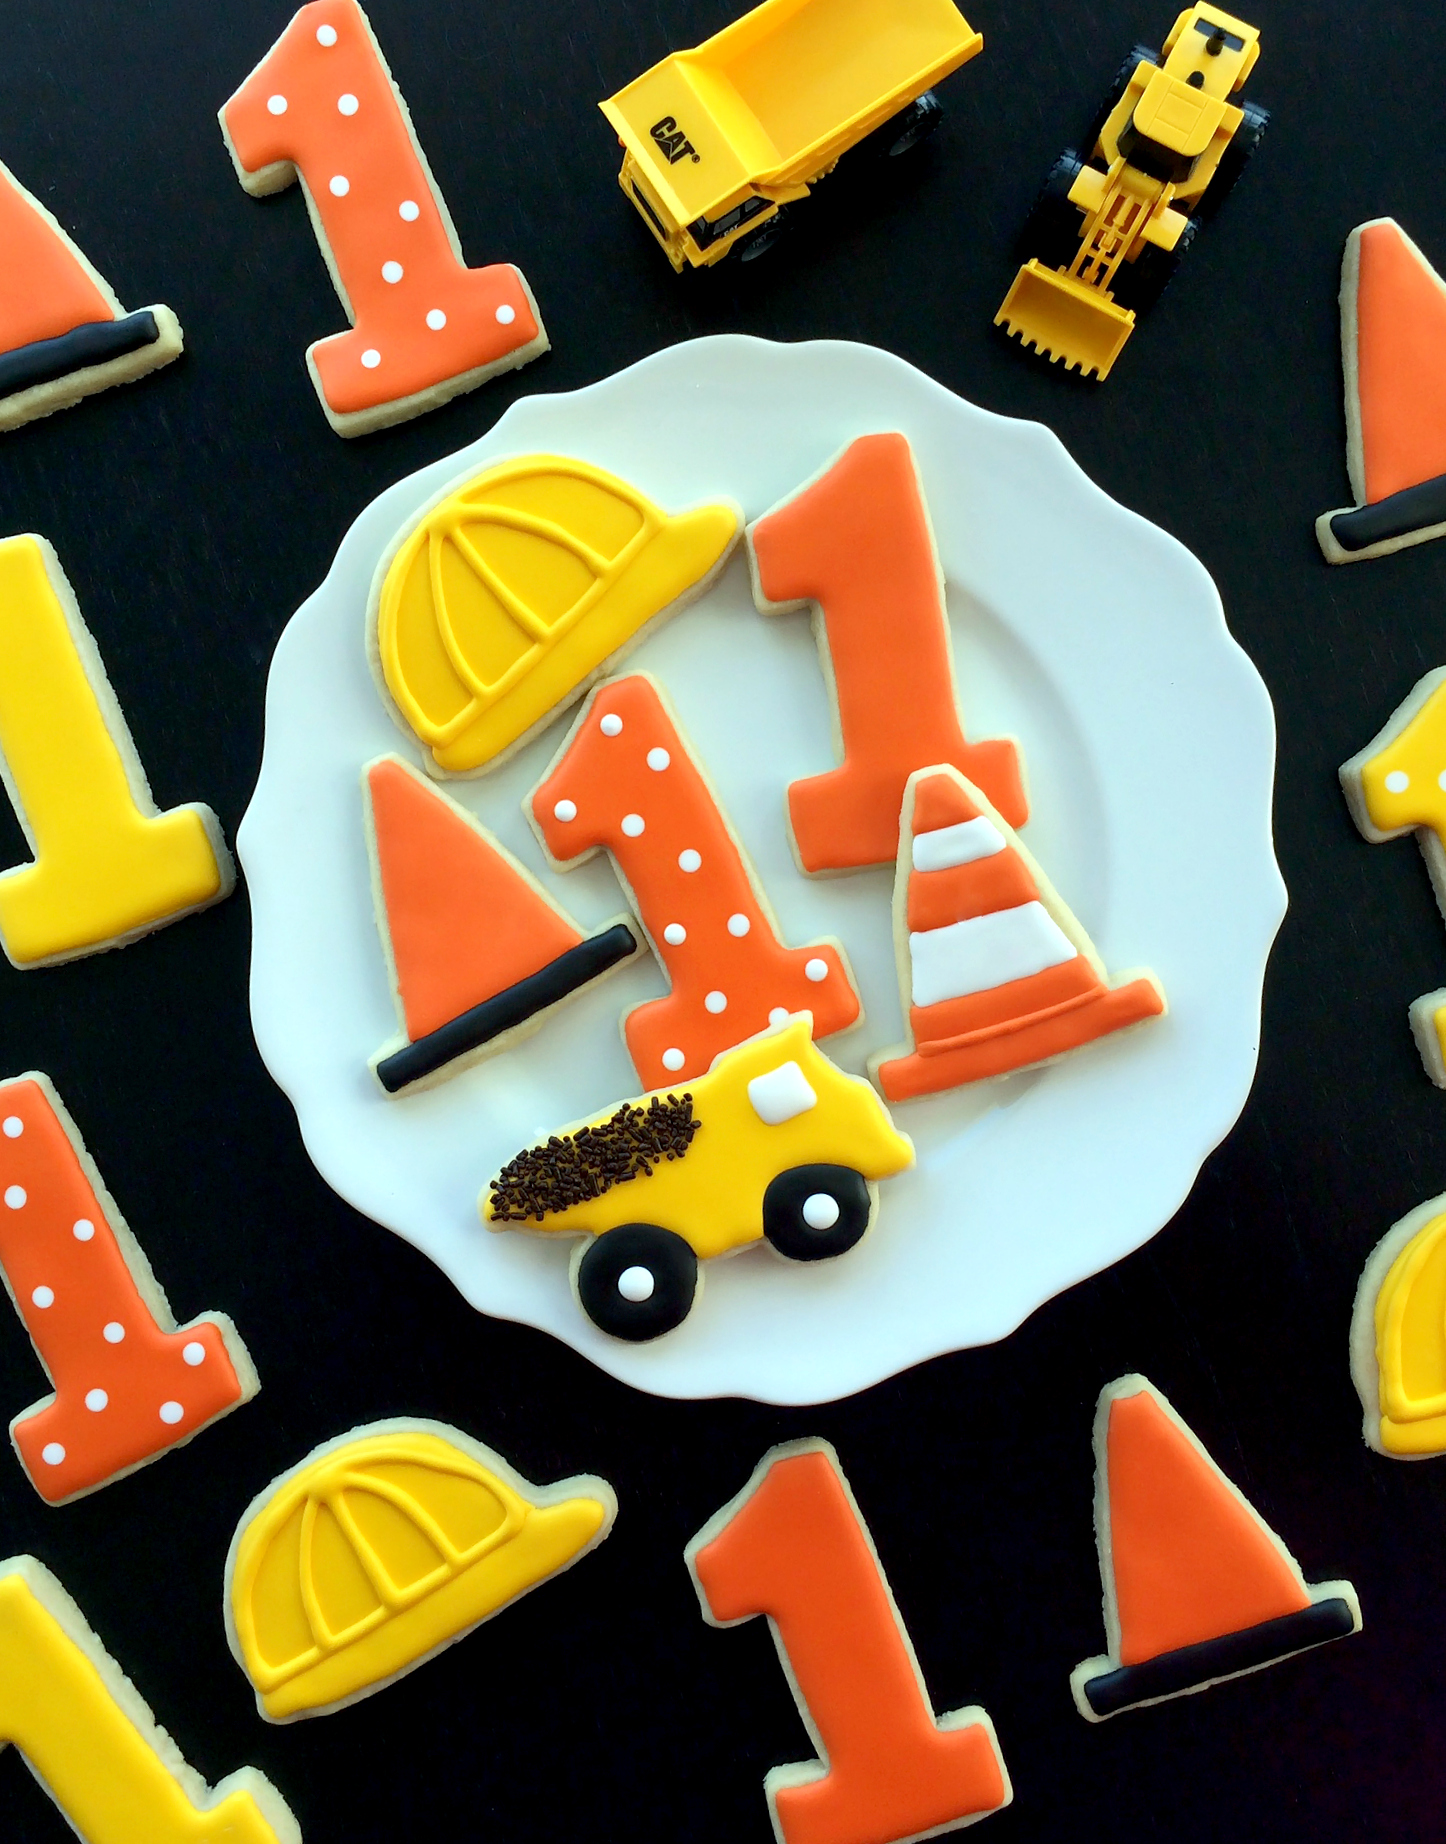
For the cookies, I wanted to have a few different varieties to make the platter interesting, but stick to simple colors and designs. I decided to play up the yellow and orange from the cake decorations and made hard hats, dump trucks, and construction cones. I also wanted to make it clear that this was a first birthday celebration, so I made a bunch of number one cookies (some with polka dots to keep it fun). 

Construction-themed sugar cookies

Construction-themed sugar cookies

I really love the chocolate sprinkle "dirt" on the dump truck:

If only real dirt tasted like chocolate sprinkles...

If only real dirt tasted like chocolate sprinkles...

Thank you for letting me be part of your day, Noah! Happy birthday!


Other notes:

  • I ordered the CAT Mini Machine 5-pack and Construction Cone Candles from Amazon, but I've also seen them at party supply stores.
  • I found the number one and construction-themed cookie cutters at CheapCookieCutters.com. 
  • To tint the royal icing, I used AmeriColor gel paste colors Egg Yellow and Lemon Yellow (for the construction yellow) and a combination of Orange and Tulip Red for the vibrant orange shade.
tags: celebration, birthday, chocolate, decorated
categories: cookies, cakes
Thursday 04.23.15
Posted by Michelle
 

Throwback Thursday -- My First Time Decorating Cookies

In honor of #tbt, I thought I'd share my first experience making decorative cookies, since that's where this hobby all began.

Throwing back

For my daughter's first birthday, we did a storybook theme and hired a professional baker to create individual cupcakes inspired by nursery rhymes. They were adorable...and incredibly expensive. For her second birthday, I found this girly Elmo theme on some modern mother website (I can't remember which one); I loved the idea of taking Sesame Street and putting a really feminine spin on it (if you knew my daughter, you'd understand). 

Ingrid's 2nd birthday, brought to you by the letter I and number 2

So I ordered the custom street sign, cut out gross amounts of paper products (cupcake wrappers, invitations, party favor tags, etc.), and got some matching balloons. And then I lost my mind and decided to, for the first time ever, make the dessert.

The cupcakes were fairly easy -- I just bought a cake mix and used some store bought pink frosting. I used my handy dandy idiot-proof Nordic Ware frosting contraption (which is what I called it back in my ignorant days) to make them look somewhat presentable. If you throw enough decorations on there, people won't even notice the lack of consistent frosting coverage.

Nice piping job, huh?

The cookies, however, were a different story. First of all, I had to have the whole Sesame Street theme going, which meant I needed to find letter "I" and number "2" cookie cutters that were the same size (because I'm overly concerned with these things). You know. To mimic the Sesame Street episode thing: Sesame Street is brought to you today by the letter I and the number 2. Clever, right?

So, great idea. Horrible execution. I had no idea what I'd gotten myself into. All I knew is I had a little almost two-year-old girl who couldn't wait to have her birthday cookies and I had no backup plan. Let me break down how it went:

  1. Find sugar cookie recipe
  2. Attempt to make sugar cookie recipe
  3. Realize sugar cookies are actually pretty hard to make
  4. Contemplate how the bakers at Target make it look so easy
  5. Blame the oven for the sugar cookies spreading into unrecognizable blobs (that's an "I"???)
  6. Curse
  7. Eat a cookie. Not bad...
  8. Blame recipe for being stupid
  9. Find new sugar cookie recipe
  10. Repeat steps 2-9
  11. Find new recipe. Bake. Cookies actually look how they should. Mostly
  12. Attempt to make and use royal icing and piping bags for the very first time ever
  13. Lament at what a horrible mother, woman, human I am
  14. Why did I go to college? I can't even get a piping bag to work!
  15. Go back online and try to find anyone who can make these for me instead
  16. Curse
  17. Go to bed. Try again next day
  18. Use new royal icing recipe. This one is better...meaning I can actually pipe some semblance of a straight line and the icing is only a little lumpy
  19. Delight daughter with my mad baking skills (that means she really like the colors I used)
  20. Come to terms with that whole "It's the thought that counts..." thing
  21. Share results
Look at those outlines!

Look at those outlines!

Funny...I was pretty proud of these back in the day...

Funny...I was pretty proud of these back in the day...

The cookies tasted better than they looked, and they made my little girl happy, so I achieved that goal. 

That was almost three years ago. In a few more weeks, Ingrid will turn 5 and, for the first time since this party, I won't be making cookies because I'll still be standing in line at Disney World, waiting to meet Elsa. 

I will say, however, that it was this experience that sparked my interest in baking. I wanted to learn more, get better, be more confident because, for some reason, I got this notion in my head that my making treats for people was a way to show my love and appreciation. And really, how can you resist the smiles you get when you surprise people with dessert? 

So, on this #tbt, I reminisce about that party, three years ago, that turned me into a hobby baker and made my daughter smile.

Ingrid, age 2

Ingrid, age 2

tags: birthday, sugar cookies, decorated, #tbt
categories: cookies
Thursday 01.15.15
Posted by Michelle
Comments: 1
 

Thanksgiving Cupcakes

These Thanksgiving cupcakes are a simple way to create unique table settings for the holiday. There are a number of turkey-inspired cupcakes floating around Pinterest, but I think these are the cutest. And they make four-year-olds to 60-year-olds smile, so they have that going for them. 

Start with basic chocolate cupcakes and chocolate buttercream (my go-to recipes are below). You'll also need the following:

  • Candy corn (for the feathers)
  • Nutter Butter cookies (for the head)
  • Reese's Pieces or Skittles (for the nose); orange only
  • Wilton Candy Eyes (for the...eyes)
  • Red licorice (for the snood)
  • White icing (to adhere the candy pieces to the cookie)

All the makings for the turkeys

After you've frosted your cupcakes, insert six (6) pieces of candy corn around the rim. You'll want to insert them enough that the white portion of the candy corn is no longer visible. 

A sea of headless turkeys

Then it's time to work on the turkey face. Start with the eyes, then the nose, and finish with the snood. I found it was a lot easier to get the candy to adhere to the Nutter Butter (never thought that'd be a phrase I'd use) if I could avoid the seams as much as possible. I piped the icing onto the cookie, then pushed the candy into it. The nose is the hardest, simply because you have to get it to stay on it's edge. Just hold it in place for a few seconds to ensure it's adhered. 

I let the cookies sit for about 30 minutes before inserting them into the cupcakes. To keep the cupcakes from tumbling over, insert the cookie just shy of halfway. This height also provides plenty of clearance for most cupcake holders (in case you need to travel with these).

Happy Thanksgiving!

I made these cupcakes using my ENHANCED CHOCOLATE CAKE MIX and FAVORITE CHOCOLATE BUTTERCREAM recipes.

tags: chocolate, holiday, special occassion, decorated, buttercream
categories: cupcakes
Thursday 11.27.14
Posted by Michelle
 

Copyright © 2019 I Bake, You Bake